
Physioster is reader-supported. When you buy through links on our site, we may earn an affiliate commission. Learn more
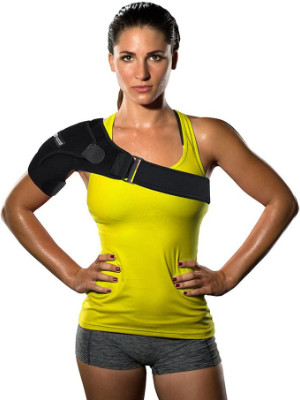
The Copper Fit Shoulder Brace is designed to be used in either the left or right shoulders. This Copper fit shoulder brace instructions will first deal with how to prepare and use the shoulder brace in the right shoulder.

BUY ON AMAZON
Copper Fit Shoulder Brace Instructions for the Right Hand
The first thing to do is unwind the main strap and lay the shoulder brace on a flat surface with the Copper Fit logo facing you on the upper left side. Now open the brace such that the L and R side marks are up.
After that open, the hook and loop closure on the pouch which is designed to hold two triangle-shaped gels pack one on the right side and another on the left side.
Once you have opened the pouch, go ahead and insert the gel packs on the left and right sides but ensure to always keep the flat side of the gel packs at the bottom of the wrap. The next step is to secure the hook and loop closure.
Now turn the wrap and fold it in half such that the Cooper Fit logo and the D-ring are facing you while the R and L inside it are facing the bottom. After this, remove the fastener attachment located at the end of the main strap and set it aside.
You now have to pull the main strap over the brace and thread it into the D-Ring facing you and then through the D-ring on the other side.
It is now time to wear the shoulder brace. Slide your right hand through the bottom of the wrap and pull it onto your shoulder until the main strap is hanging down below your shoulder towards the ground.
Using your left hand, pull the main strap to tighten the wrap around your right hand and then reach behind your back, grab the main strap and then pull it around your back and up over your chest. After this, you can now take the fastener attachment and attach it back onto the main strap.

Once the fastener is attached pull the main strap securely so that your shoulder is snug while the strap stays flat. Now place the hook side of the fastener attachment on the loop side of the wrap’s frame and you are done.
Copper Fit Shoulder Brace Instructions for the Left Shoulder
Unwind the main strap and lay the shoulder brace on a flat surface with the Copper Fit logo facing down against the surface such that you no longer see it. Now open the brace such that you can see L and R side markings.
After that open, the hook and loop closure on the pouch and insert the gel packs on the left and right side with their flat sides facing the bottom of the wrap and then secure the hook and loop closure.
Turn the wrap over and fold it in half such that the buckles are on the top right while the Cooper Fit logo is facing down on the surface and the R and L is inside the bottom.

You are now to remove the fastener attachment located at the end of the main strap and set it aside then pull the main strap over the brace and thread it into the D-Ring that is on top facing you and then through the D-ring on the other side.
Slide your left hand through the bottom of the wrap and pull it onto your shoulder until the main strap is hanging down below your shoulder towards the ground then pull it to tighten the wrap around your arm.
Using your right hand, reach behind your back and grab the main strap then pull it around your back and up over your chest.
Now take the fastener attachment and attach it back onto the main strap then pull the main strap securely so that the wrap is snug while the strap stays flat. Now place the hook side of the fastener attachment on the loop side of the wrap’s frame and you are done.
Conclusion
You should note that the instructions on how to cool or heat the gel packs are printed on their surface.


